If you as I are studying for the CCIE R&S you should be using Putty? Why? Because for the
R&S track Putty is used in the lab. Yes, I an many others use SecureCRT and love the tabs
but you don’t want to go to the lab and do anything for the first time, except get your number!
Therefore we should use Putty to practice.
I use rack rentals and Dynamips for my studies, in either case I need to connect to a least 10
devices, the 6 routers and the 4 switches. This can be a bit tedious to do everytime you
want to study. Here is my solution for it. Start by installing Putty, I usually just use the
executable but you want to install it to be able to use it from the command line.
Download it here.
Install it to a directory of your preference.
Open a command prompt and type putty, what happens? Nothing, because Windows
doesn’t know where Putty is located. Either you can type C:\Program files\Putty\Putty.exe
or where you installed it everytime you want to use it but there is a better way.
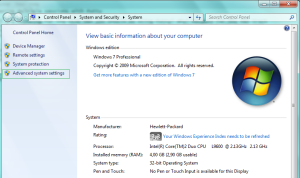
Start by clicking the Start button and then right clicking on “Computer” and then
choose “Properties”.
Then we will have a new screen where we whant to choose “Advanced system settings”.
After that choose “Environment Variables…”.
Scroll down the “System variables” until you see “Path”. Select this and then choose edit.
After every entry there needs to be a semicolon. Scroll to the right and after your
final entry put “;C:\Program files\PuTTY” or the directory where you installed it.
You do not need the “”.
Windows will now know where Putty is located. If you type Putty from the
command prompt Putty will load. The advantage now is that we can use Putty from the
command line, you can used putty -telnet or putty -ssh to open sessions from the
command line but we are interested in putty -load. This is how I have things setup.
We need to create sessions in the GUI that we can load from the command prompt.
If you are using rack rentals like graded labs you telnet to a terminal server and
can create sessions by using different usernames. You can see that I connect
to racks.ine.com on port 23.
Some things that you might like to change, in the “Windows” section change
the scrollback. I use 5000 lines of scrollback. You want to be able to run debugs
and then scroll back and go through the output.
I use a different font than standard, you can change this in “Appearance”.
The one I use is called Lucida Console.
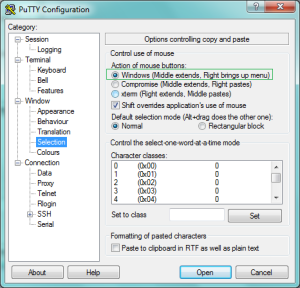
I also like to change the selection behaviour. The default is to paste on right click.
I change it to bring up a menu on right click. If I want to paste something directly
I can use shift+insert.
This is enough to get us started but first lets make some more changes.
Under “Behaviour” we can set “Window title:”.
Set this to the device name like R1, R2, SW1 etc.
This will help us to know which device we are logged in to.
When you have edited your settings you need to save them to a session.
Choose “Session” and then “Saved Sessions” and enter a name for the session
and then click “Save”. To save more sessions leave the settings as they are, enter
a new name under “Saved sessions”, change the window title under behaviour, when
this is done click save and the session will be saved with the new name.
Do this for all the devices.
To load the sessions from the commandline we use putty -load.
I made a quick .bat file to start all my sessions. The code looks like this:
start “R1″ “C:\Program Files\PuTTY\putty.exe” -load rr-r1
timeout /T 2 > nul
start “R2″ “C:\Program Files\PuTTY\putty.exe” -load rr-r2
timeout /T 2 > nul
start “R3″ “C:\Program Files\PuTTY\putty.exe” -load rr-r3
timeout /T 2 > nul
start “R4″ “C:\Program Files\PuTTY\putty.exe” -load rr-r4
timeout /T 2 > nul
start “R5″ “C:\Program Files\PuTTY\putty.exe” -load rr-r5
timeout /T 2 > nul
start “R6″ “C:\Program Files\PuTTY\putty.exe” -load rr-r6
timeout /T 2 > nul
start “SW1″ “C:\Program Files\PuTTY\putty.exe” -load rr-sw1
timeout /T 2 > nul
start “SW2″ “C:\Program Files\PuTTY\putty.exe” -load rr-sw2
timeout /T 2 > nul
start “SW3″ “C:\Program Files\PuTTY\putty.exe” -load rr-sw3
timeout /T 2 > nul
start “SW4″ “C:\Program Files\PuTTY\putty.exe” -load rr-sw4
I have implemented a 2 second wait between each session because the sessions
time out quite fast and we need time to type username and password.
The timeout may not be availabe in systems older than Vista but you may
solve this by using a ping command or so. This bat-file can also be used to open
remote sessions to a Dynamips-server. The only thing that changes in the Putty
sessions is that we connect via ssh and then ports 2000 and upward.
If you connect to Dynamips you don’t need to implement the timeout command.
Hopefully this post has showed you new ways of using Putty and has speeded up your labstudies.


